Table of contents
- The requirements
- Low cost example system
- Obtaining the operating system and creating a bootable USB Drive
- Installing Ubuntu on the system you will be using
- Connecting to the new system using Putty
- Updating and cleaning the system, then installing steamcmd
- Creating a user to run the server
- Switching to the steam user account and installing the actual Palworld server
- Running and configuring the Palworld server
- Setting up the Palworld service
- Performing backups and saving them offsite
- Forwarding Ports for Outside Access
- Automatically cleaning up the save directory
- Restoring backups
The Requirements
- CPU: 4 cores, x86-64, you do NOT need more than 4 CPU cores, single thread performance is key
- Memory: 32gb available memory, that’s not total memory, that’s available after anything else you are running
- Bandwidth: 1Mbit in/out per player on average, not at all bandwidth intensive, least important by far
- HDD: 3gb minimum available space, recommend you commit at least 10-15gb of free space
- Operating System: Linux/Windows, x86-64, Linux strongly preferred! This guide will only cover Linux using Ubuntu 20.04 due to its ease for the average person to use.
Low cost example system
The system I currently use for hosting a Palworld server is an HP EliteDesk 705 G4 Desktop Mini equipped with the following hardware:
- CPU: Ryzen 5 2400GE, 35w max power consumption, 4 cores, 8 threads, 3.2ghz base frequency, 3.8ghz turbo frequency
- Memory: 64gb DDR4 3200mhz CL22
- Bandwidth: 1gbit in, 45mbit out
- HDD: 512gb Gen3 NVMe
- Operating System: Ubuntu 20.04 x64
Total cost of the system used not including bandwidth is as follows,
The initial cost of the HP Elitedesk 705 G4 Mini which came with the CPU, 16gb of memory and 128gb sata HDD was $97.88 after tax and shipping from ebay, the included memory (mismatched) and HDD were NOT used.
$150.06 was spent to put a KingSpec NX Series 512gb Gen3x4 NVMe SSD and 64gb of TEAMGROUP Elite DDR4 3200mhz CL22 memory into the system. The NVME was around $36 after tax and the memory was around $115 after taxes, an additional $6.51 was spent on a Thermalright TR-M.2 2280 Type A G 2280 Heatsink for the NVMe, friends don’t let friends leave modern NVMe drives bare.
The system was cleaned, new thermal paste, the thermal pads for the vrm’s was replaced with thermal putty, etc, these are not included in the cost.
Total: $254.45 for a very small, fairly quiet and low power system that exceeds the needs of the project easily.
Obtaining the operating system and creating a bootable USB Drive
You can download Ubuntu 20.04 Here or Here
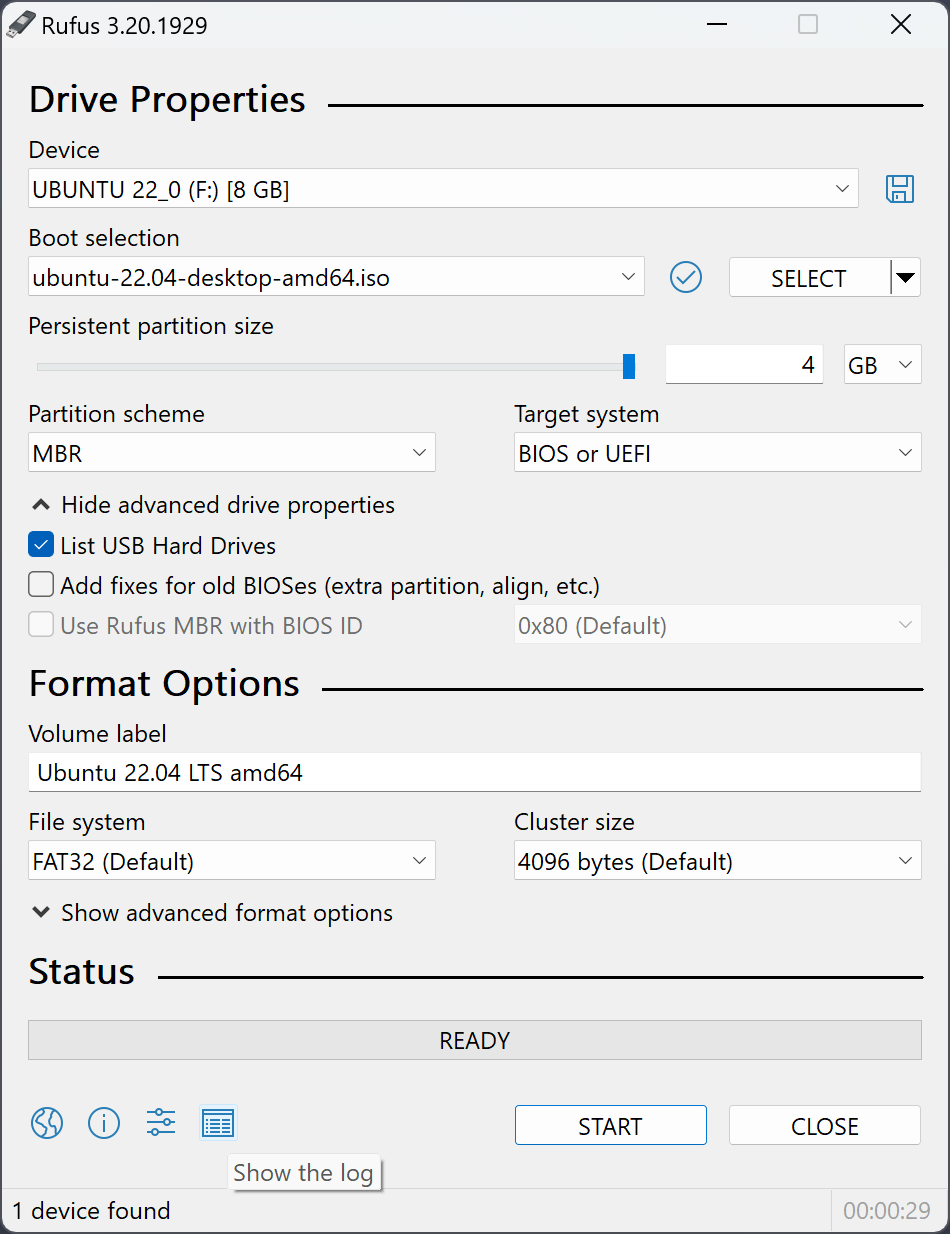
You can download Rufus Here or Here
Once you have finished downloading the Ubuntu 20.04 ISO, you will need a spare USB drive that you are willing to completely wipe, the drive needs to be at least 2GB in size, but a faster and larger drive is preferable.
Insert the flash drive, take note of which drive letter it is and then open Rufus, it should automatically select the correct drive under “device” if you only have one USB drive inserted. Click “Select” then navigate to and select the Ubuntu 20.04 ISO file. Click Start and wait for the process of writing the files to the USB drive to finish, this can take as little as a few seconds or as long as a few minutes depending on the speed of the drive.
Installing Ubuntu on the system you will be using
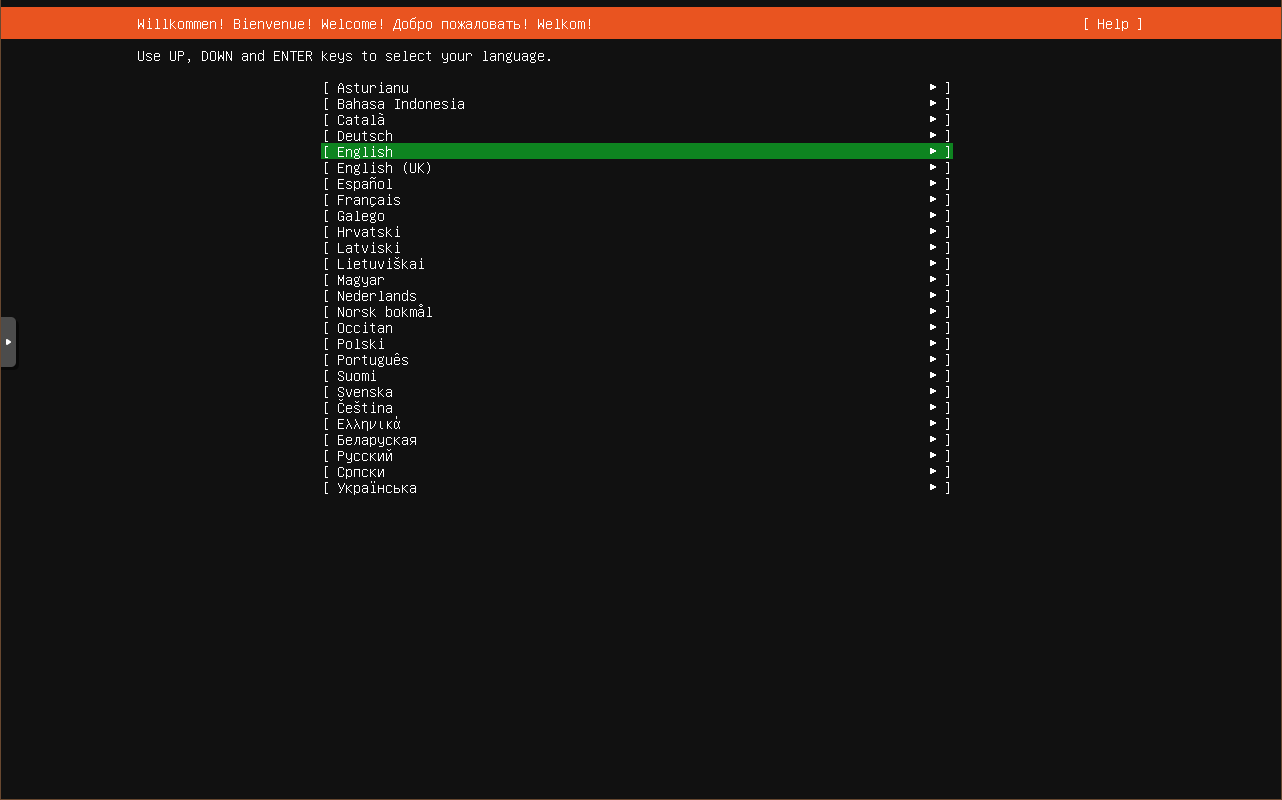
Boot from the USB drive created by Rufus in the previous step after inserting it and turning on the computer then pressing/holding the boot device selection key for your specific hardware during power on then select the USB drive.
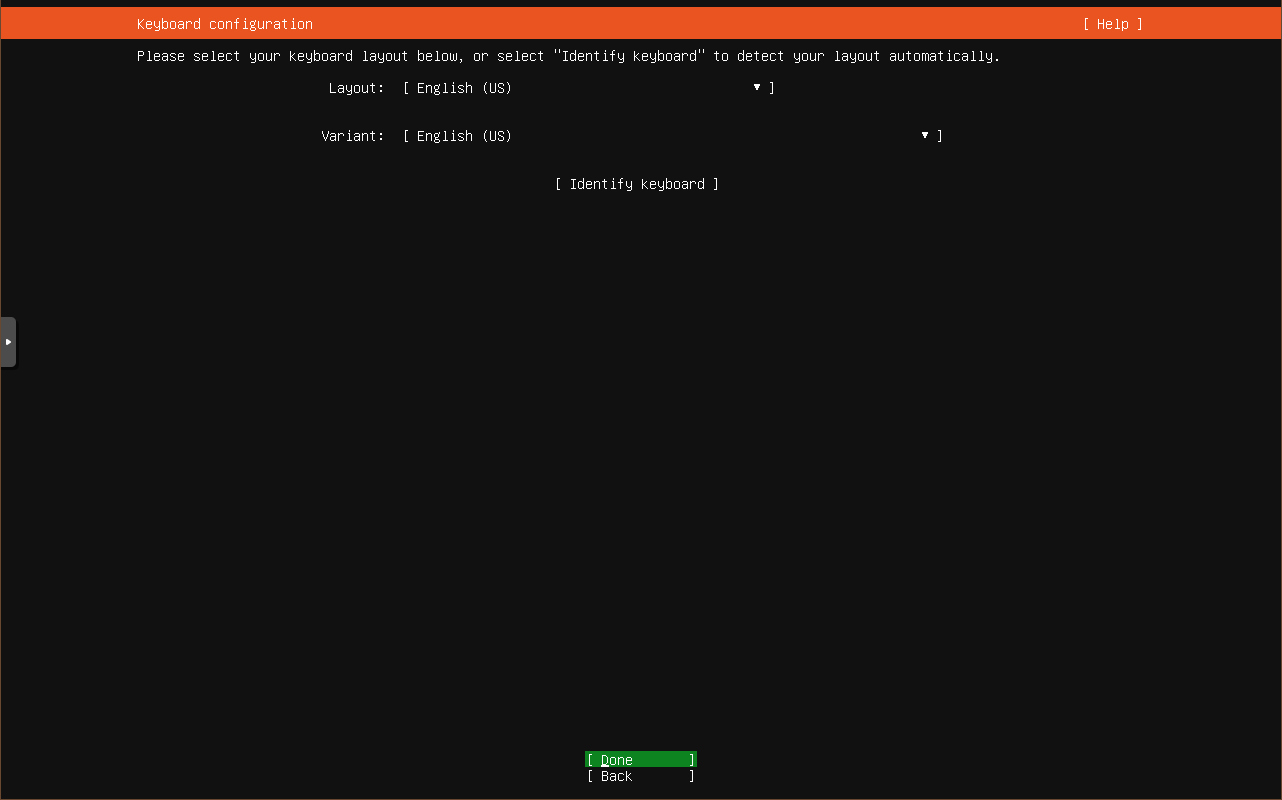
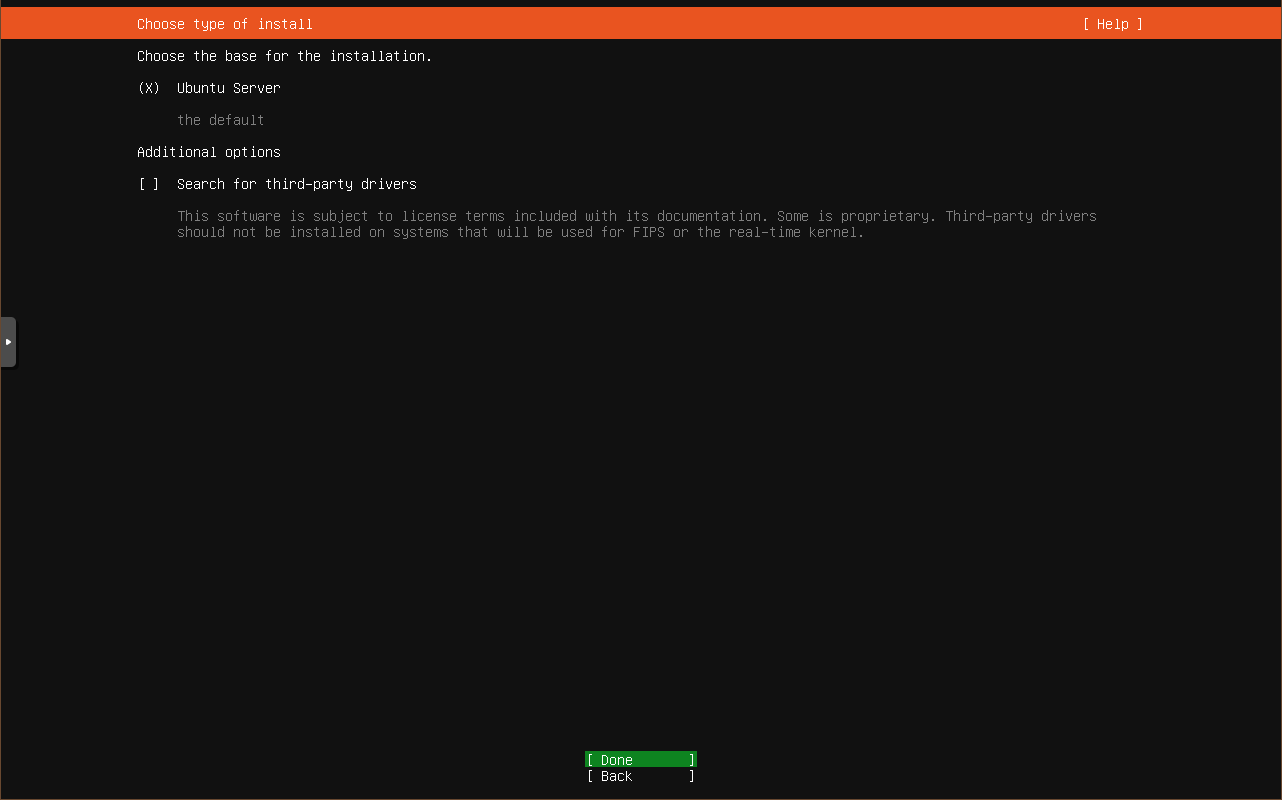
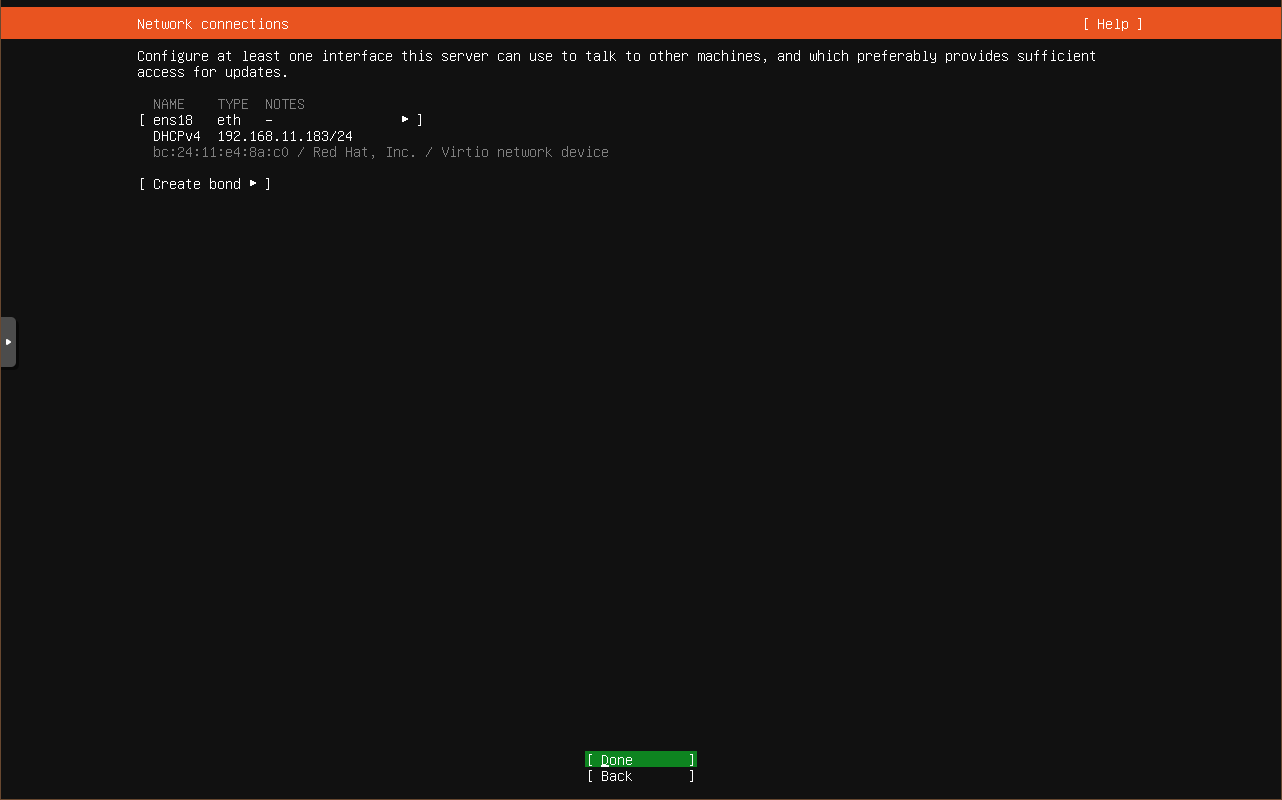
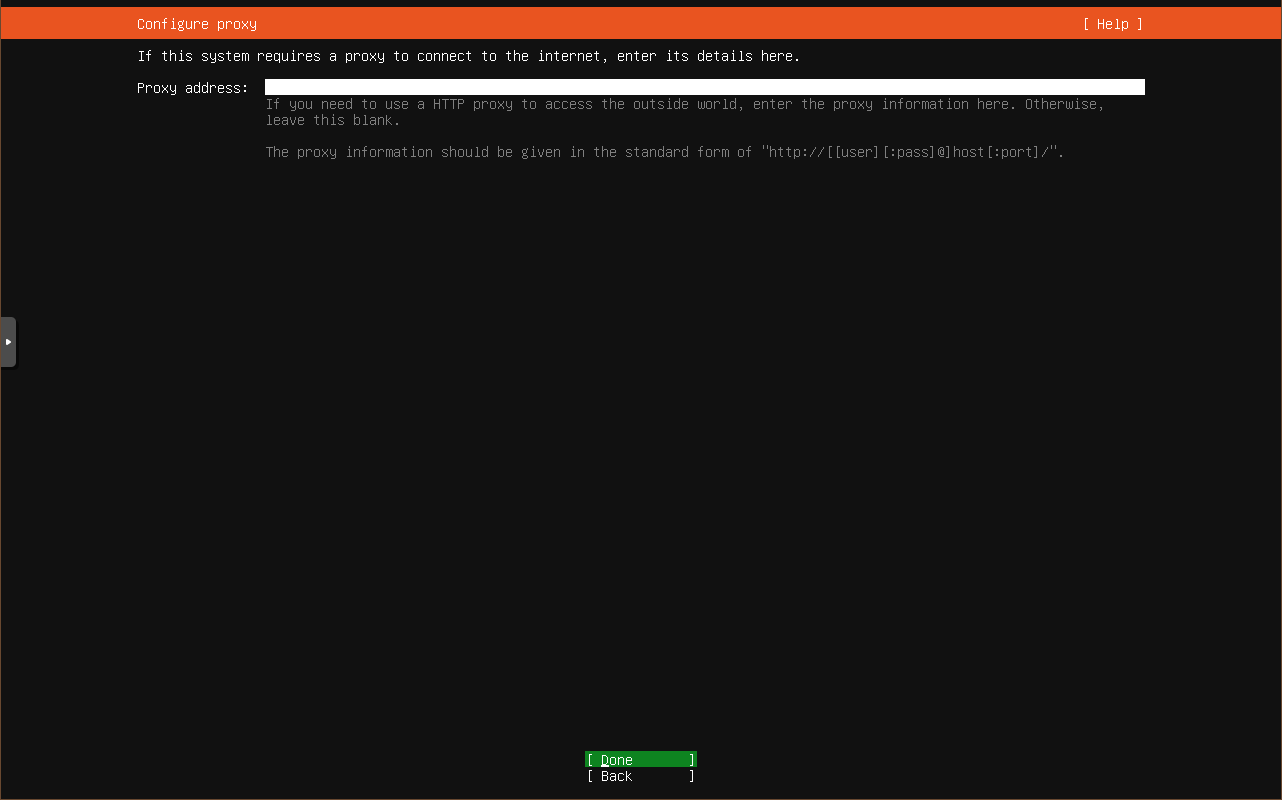
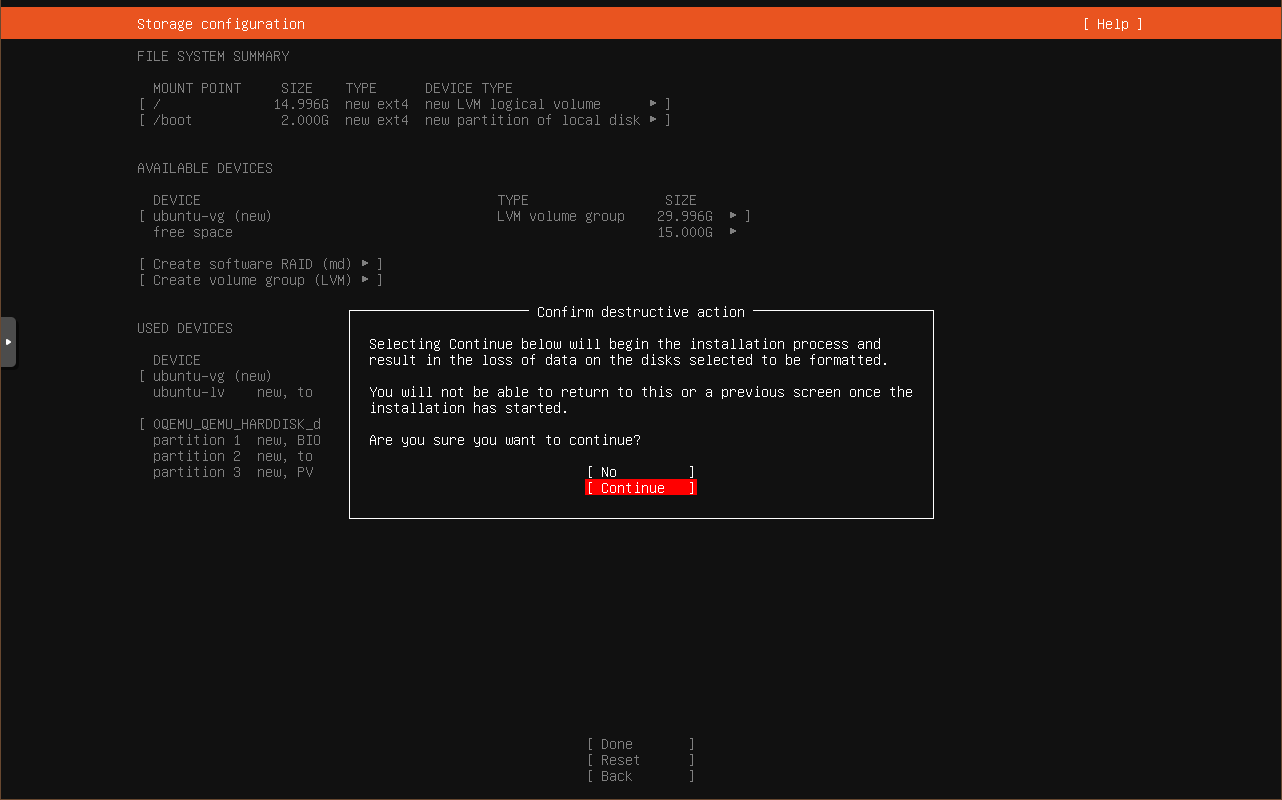
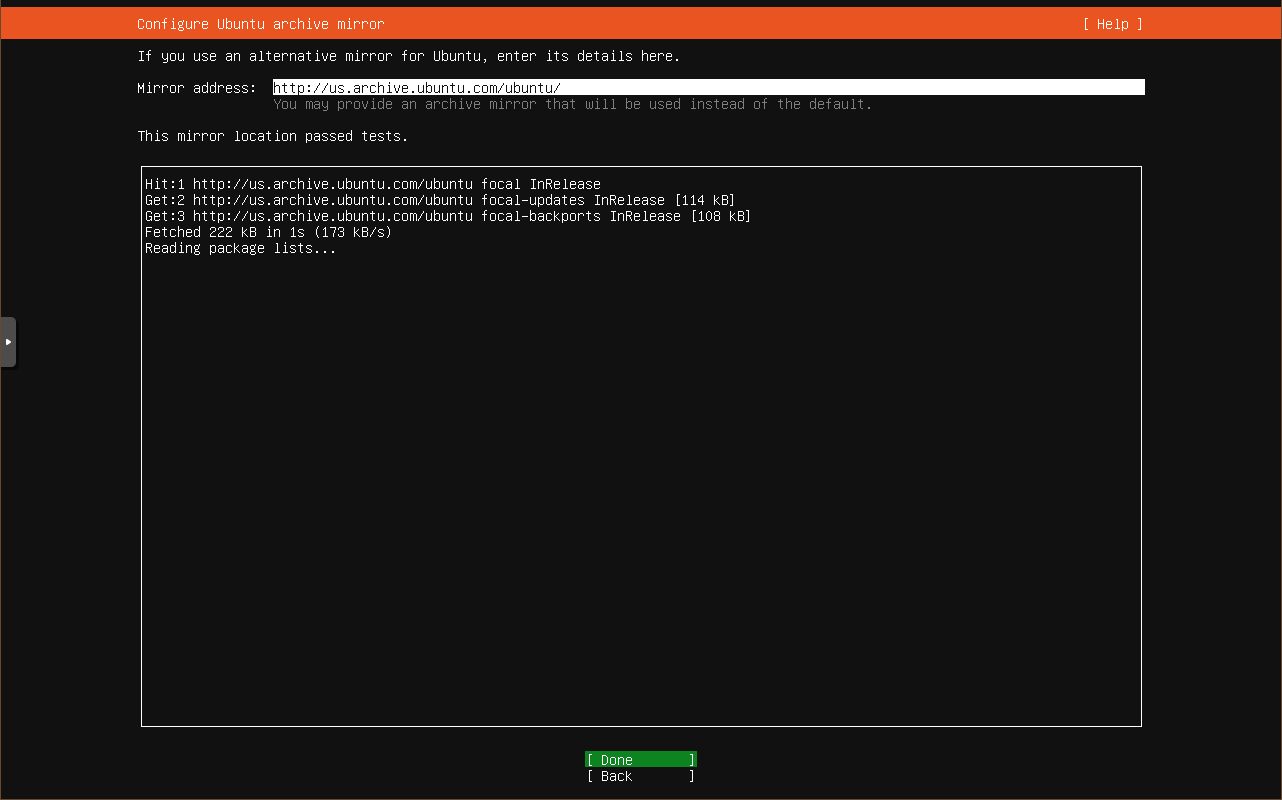
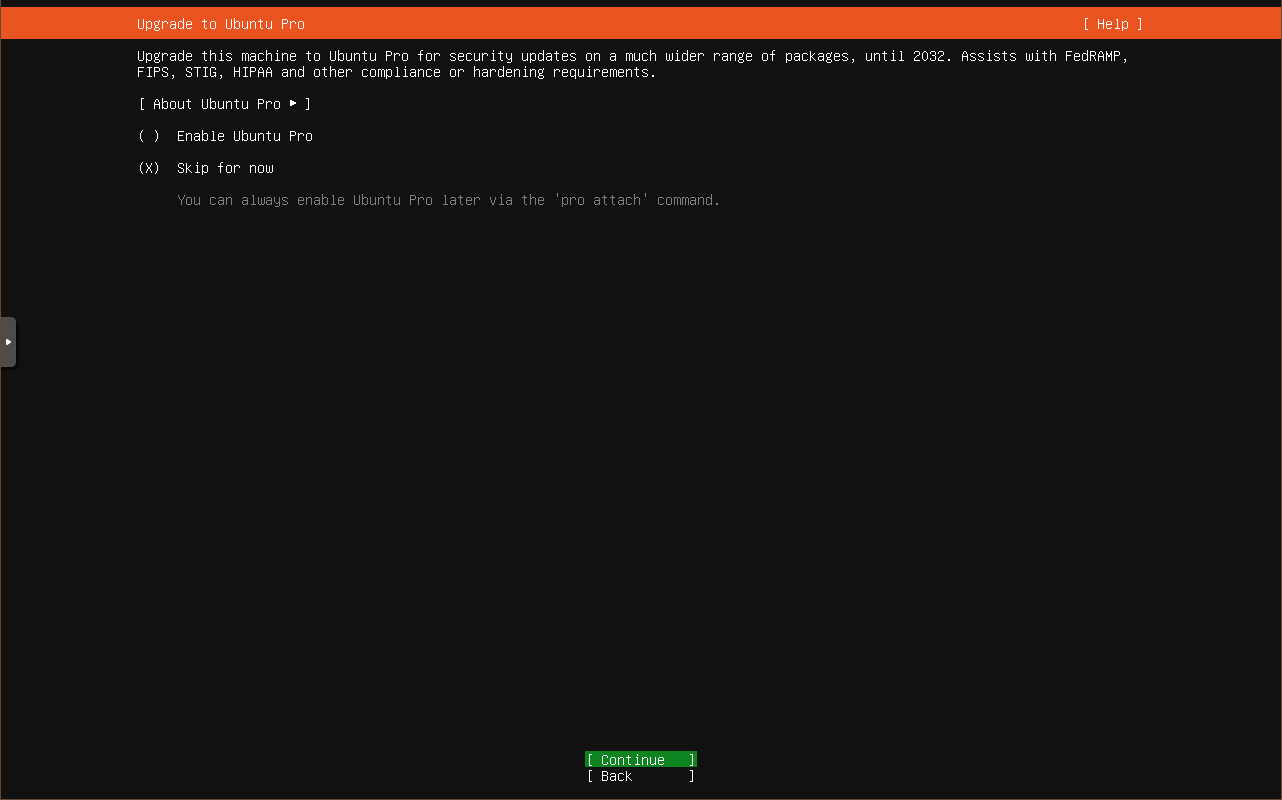
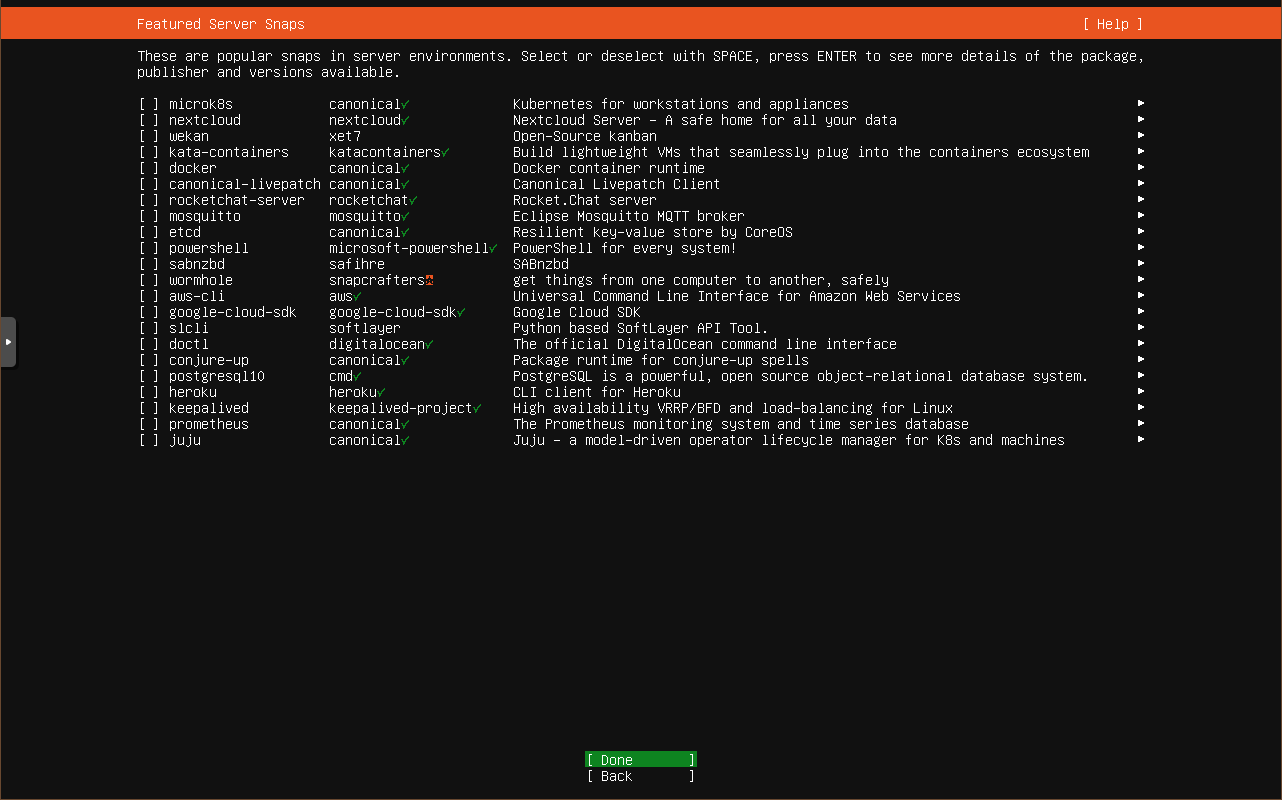
On the first screen, select your language, keyboard layout, and most likely all the default values until the user creation screen, the screens will look like the following screenshots.
During the below step, you can set a static IP if you need to.
!!!IMPORTANT!!!
REMEMBER THIS IP ADDRESS

During the below step, you will need to create a user account and name your system, remember these details

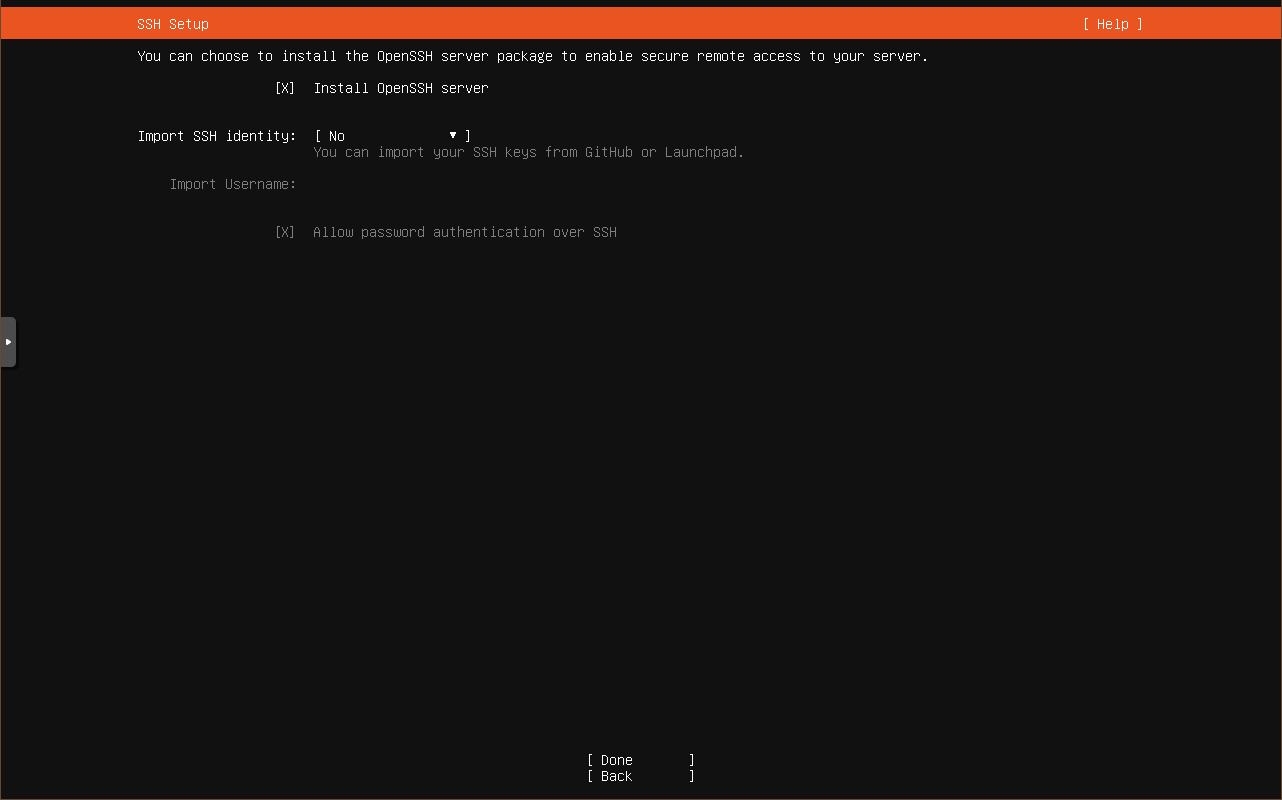
!!!THIS STEP IS IMPORTANT BELOW!!!
Check the option for “Install OpenSSH Server”
Once the install is done, you will be asked to reboot the computer and remove the USB drive on the next screen.

Connecting to the new system using Putty
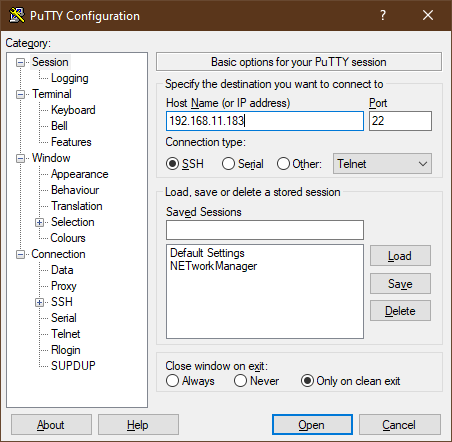
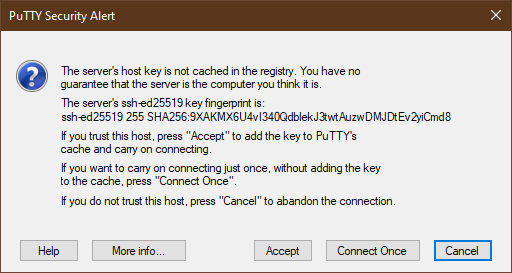
Assuming you are using Windows to connect to your new server, download and install Putty from here by selecting the 64-bit x86 Windows Installer, then install Putty and open it up, you’ll see a screen like the below screenshot, type the IP address of the system you want to install the palworld server onto into the ‘Host Name’ field and press open.
You can press “accept” on the below warning if you receive it.
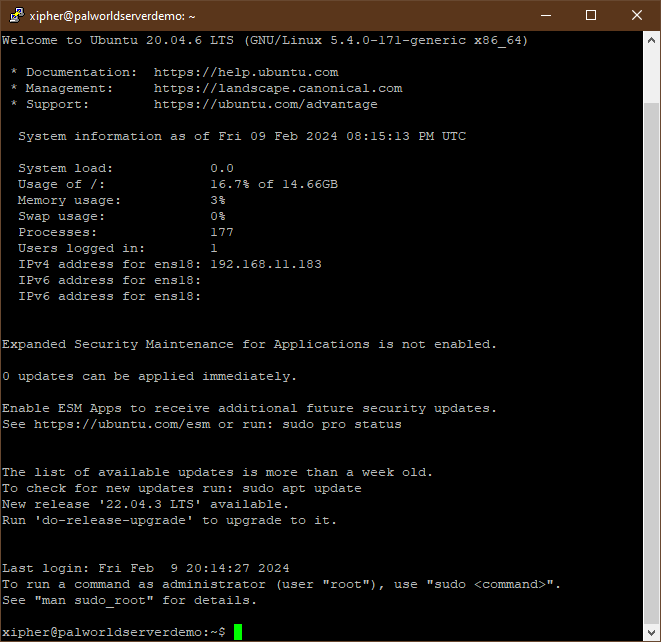
Once you enter your username and password, you will see a prompt like the screenshot below.
Updating and cleaning the system, then installing steamcmd
Don’t want to read whats below and just want to run all the commands at once? Click here.
sudo apt update&&sudo apt upgrade -y&&sudo apt autoremove -y&&sudo apt autoclean&&sudo apt install -y software-properties-common&&sudo dpkg --add-architecture i386&&sudo add-apt-repository multiverse&&sudo apt update&&sudo apt install -y steamcmdUpdate and clean up the system with the following command, it will first look for updates, then perform the update, then remove any unneeded packages left over after the updates.
sudo apt update&&sudo apt upgrade -y&&sudo apt autoremove -y&&sudo apt autocleanThe next command will install the ‘software-properties-common’ package which allows us to perform future steps regarding changing/enabling repositories in case your install doesn’t have them active/available. You’ll likely see a message that the software is ‘already the newest version’ and nothing is installed, this is AOK and actually expected, some of these commands are just making sure required items are installed correctly just in case right now.
sudo apt install -y software-properties-commonRun the following command to enable the 32bit repository since steamcmd is only available there.
sudo dpkg --add-architecture i386Next we enable the required repository using the following command in the event that its not already enabled and update our list of available software after doing so.
sudo add-apt-repository multiverse&&sudo apt updateThen we install steamcmd with this command.
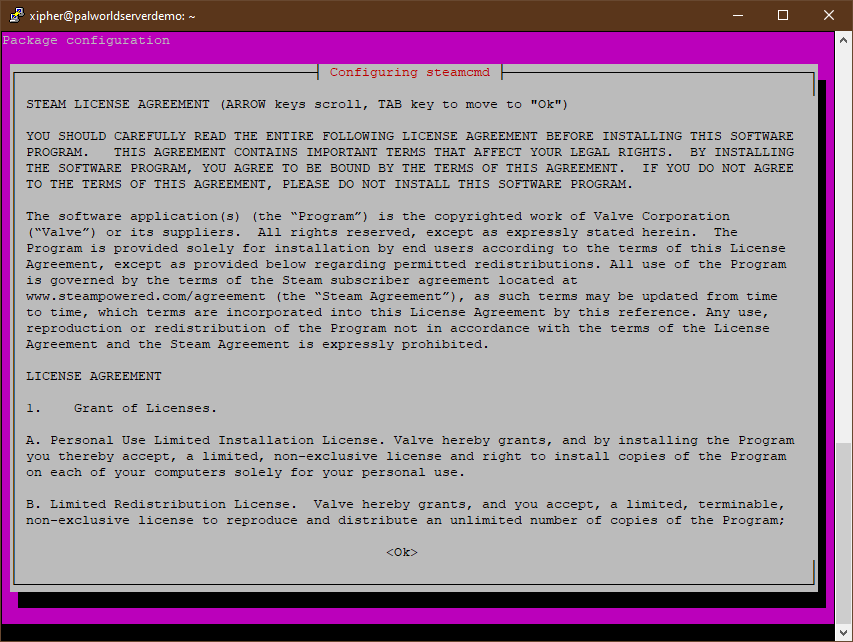
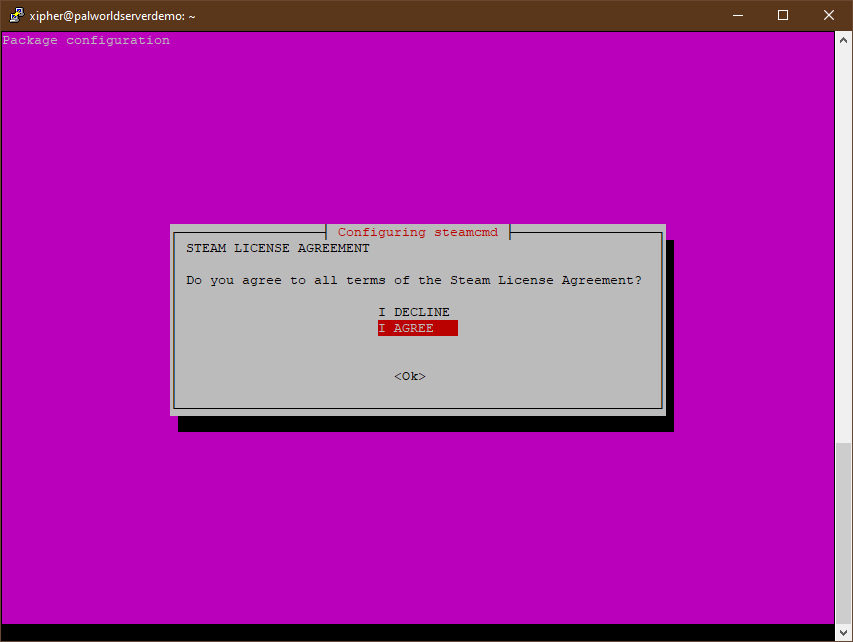
sudo apt install -y steamcmdYou’ll be asked to accept an agreement that looks like the screenshots below, this is normal, you can just accept it.
Creating a user to run the server
Don’t want to read whats below and just want to run all the commands at once? Click here.
sudo useradd -m steam&&sudo echo 'export PATH="/usr/games/:$PATH"' | sudo tee -a /home/steam/.bashrc&&sudo chsh -s /bin/bash steamCreate a new user to run the Palworld server as on the system using the following command.
sudo useradd -m steamNext, a path variable needs to be added to the ‘steam‘ user’s profile to make steamcmd easier to access with the following command.
sudo echo 'export PATH="/usr/games/:$PATH"' | sudo tee -a /home/steam/.bashrcAnd then we’ll change the default shell for the steam user to bash just to save some possible headaches later.
sudo chsh -s /bin/bash steamSwitching to the steam user account and installing the actual Palworld server
Switch to the newly created ‘steam‘ user by using the following command
sudo su - steamDon’t want to read whats below and just want to run all the commands at once? Click here.
steamcmd +force_install_dir '/home/steam/Steam/steamapps/common/steamworks' +login anonymous +app_update 1007 +quit&&mkdir -p /home/steam/.steam/sdk64&&cp '/home/steam/Steam/steamapps/common/steamworks/linux64/steamclient.so' /home/steam/.steam/sdk64/&&steamcmd +force_install_dir '/home/steam/Steam/steamapps/common/PalServer' +login anonymous +app_update 2394010 validate +quitNow as the steam user, we’ll use the following command to install the required steamworks files to support the install in a commonly used folder structure.
steamcmd +force_install_dir '/home/steam/Steam/steamapps/common/steamworks' +login anonymous +app_update 1007 +quitThen the next command makes a directory where the Palworld server looks for a specific steam client file, it also copies that file after the directory is created.
mkdir -p /home/steam/.steam/sdk64&&cp '/home/steam/Steam/steamapps/common/steamworks/linux64/steamclient.so' /home/steam/.steam/sdk64/Finally for this section, we’ll actually download and install the Palworld dedicated server its self with this command.
steamcmd +force_install_dir '/home/steam/Steam/steamapps/common/PalServer' +login anonymous +app_update 2394010 validate +quitRunning and configuring the Palworld server
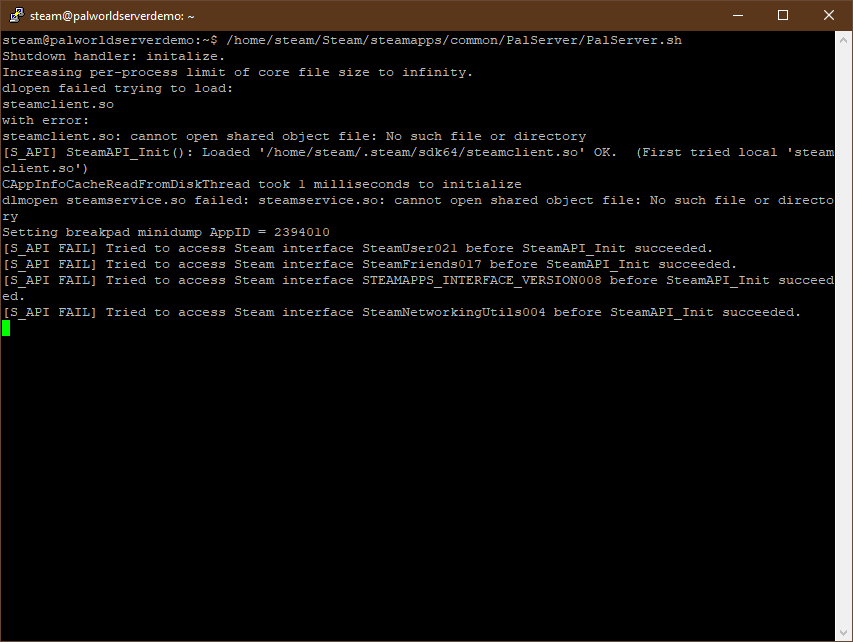
Now that the Palworld dedicated server is downloaded and installed, test that everything is working by using the following command still as the ‘steam‘ user.
/home/steam/Steam/steamapps/common/PalServer/PalServer.shIf all goes well, you should see something like the screenshot below, you can ignore the ‘S_API FAIL’ messages, they are expected and do not actually indicate a failure. If you get the final line of ‘[S_API FAIL] Tried to access Steam interface SteamNetworkingUtils004 before SteamAPI_Init succeeded.‘ everything should be working correctly.
At this point you may want to try connecting to the server from a local computer on the same network by opening Palworld and connecting to the server using the direct IP and port entry at the bottom, if you can connect, do not create a user yet, instead close the game since there is more configuration to do before actual use.
Press CTRL+C and the server will shutdown after a few moments.
With the command below, we’ll copy over the default server values before we modify them, or I recommend skipping this step if you are going to use a config file generator such as This one or This one.
cp /home/steam/Steam/steamapps/common/PalServer/DefaultPalWorldSettings.ini /home/steam/Steam/steamapps/common/PalServer/Pal/Saved/Config/LinuxServer/PalWorldSettings.iniNext we’ll open the copied file, or if you skipped the above step, we will create the PalWorldSettings.ini file and edit it using the command below.
nano ~/Steam/steamapps/common/PalServer/Pal/Saved/Config/LinuxServer/PalWorldSettings.iniWith the file open, you may edit the values if you copied the file being very careful not to change the formatting of the data, or, paste the values from the generator you used making sure you set an admin and server password as well as enabling RCON access for use in a later step.
To exit the editor and save your changes, press CTRL+X, then press Y and enter to keep the same file name.
Next type exit into the console and press enter to leave the ‘steam‘ user account on the system.
Setting up the Palworld service
In order to create a service that both automatically launches the Palworld server and keeps it running/monitored, we’ll need to create a file that defines the service, use the following command to launch a text editor that we can paste the required values into.
sudo nano /etc/systemd/system/palworld.serviceBelow is an example service definition that you can use, it assumes the system you are using has 32gb of memory and that you would like the service to restart once per day automatically, values you should configure to your needs are bold and explained below.
[Unit]
Description=Palworld Server
Wants=network-online.target
After=network-online.target

[Service]
User=steam
Group=steam
WorkingDirectory=/home/steam/
ExecStartPre=/usr/games/steamcmd +force_install_dir '/home/steam/Steam/steamapps/common/PalServer' +login anonymous +app_update 2394010 +quit
ExecStart=/home/steam/Steam/steamapps/common/PalServer/PalServer.sh -useperfthreads -NoAsyncLoadingThread -UseMultithreadForDS -RCONPort=25575 > /dev/null
MemoryHigh=31138512896
MemoryMax=32212254720
RuntimeMaxSec=86400s
Restart=always

[Install]
WantedBy=multi-user.target
The values of interest you may want to change in the above definition are below.
The MemoryHigh value tells the system to attempt to recover memory aggressively if the process reaches this level of use, above and below its set to 29gb in bytes, each gigabyte is 1073741824 bytes, you can multiply that number times how many gigabytes of memory you want to allow the service to use in order to get the numbers you’ll want to use.
MemoryHigh=31138512896Next is the MemoryMax value, if this value is reached, the system will try to kill and restart the process since it has reached a critical threshold, this level is set to nearly all of the system’s memory assuming it has 32gb, the value is 30gb in bytes which keeps some memory free for other processes, you do not want to let your server run completely out of memory.
MemoryMax=32212254720The final value of interest is the RuntimeMaxSec, this is how long the process is allowed to run before the system will restart it, 86400 seconds is the value below and equals 1 day or 24hr. Restarting the service once a day is a way of tackling the memory and cpu use issues that the dedicated server suffers from at the moment, but also the system checks for a new version of the server and updates it every time its restarted which means restarting the service once per day keeps the Palworld server up to date.
RuntimeMaxSec=86400sSave the file by pressing CTRL+X, then Y and enter to save the file, after doing so issue the next command to enable the service on the system.
sudo systemctl enable palworldIf everything is already configured to your liking in the configuration and you’re ready to run the service, issue the next command.
sudo systemctl start palworldIf you need to ‘stop’ the service, change the word ‘start’ in the above command to the word ‘stop’, you can also disable the service by changing ‘start’ to ‘disable’ in the above command.
The next step is optional but highly recommended.
Although the service profile its self specifies a maximum runtime, its both a last resort and it does not specify when exactly the service should be reset, this is something you will most likely want to set since you will likely want the server to restart at a specific time that users will know and expect.
In order to restart the Palworld server service, we will issue the command as root using cron, to do this enter the following command first.
sudo suYou should now see the prompt change to “root@” and then the name of your server, if you see this, enter the following command to edit the crontab for root to schedule the service restart.
crontab -eYou may be prompted to pick an editor to use for editing the crontab, the default should be “nano” which you can select by pressing 1, then enter, or just enter if it shows as the default, then navigate to the bottom of the file and paste the following entry.
0 4 * * * /usr/bin/systemctl restart palworld >/dev/null 2>&1After pasting the text above, press CTRL+X, then Y and enter to save the document.
The above text will cause the Palworld server to restart at 4AM UTC, you can change the time by changing the number “4” after the “0” to what ever time you would like, by default the times are in UTC, as an example 4AM UTC is 8PM PST, the hours are in a 24hr format which means 1PM would be 13, 2PM would be 14, etc. For my purposes 8PM PST or 4AM UTC was picked due to unrelated nightly events that cause all the users of the server to be least likely to be on at that time. If you need a quick way of converting your time zone to UTC, try this link HERE.
If you would like to offer users a warning before the server restarts, this will be covered in the next section.
Performing backups and saving them offsite
To perform quick and simple backups of the server save data, there’s additional requirements and software to install.
First you will need to have an account at any of the ‘cloud’ file providers on this list capable of being used with rclone, sometimes ‘free’ accounts do not allow use of rclone due to account restrictions, you will need to check with your provider of choice.
Here is a list of compatible providers, I would like to recommend using Koofr which offers 10GB free with webdav access for use with rclone on free accounts, they also have a how-to for using rclone with their services here.
I will not be going over the instructions for configuring rclone since every provider requires a slightly different configuration, the instructions from here on in will use “provider” as a placeholder for the provider you have configured in rclone, if you want to follow the instructions literally you can name your configuration “provider” during setup in rclone.
Perform the ‘rclone setup’ as the normal user of the sytem, NOT as the steam or root account.
Why?
Well you shouldn’t have your rclone configurations saved as root, and personally I dislike having any ‘service accounts’ that are externally facing like the ‘steam‘ account we’ve created having them either. Someone reading this guide might decide to use their personal google drive for backing up these files and putting a copy or rclone with read/write access to their files like that in the hands of an internet facing service account is a bad idea, sometimes the easiest or simplest way is not the best simply because the security risk is too great even though I am trying very hard to keep everything in this guide incredibly simple. This is also why you will see below that we’ll be creating three scripts with no logic, just triggers that run on timers, its supposed to be very simple for someone with little to no linux or scripting knowledge to modify it to suite their needs once they have it working as shown in the guide just by looking at what is being done.
If you are currently the ‘steam‘ or ‘root‘ user, type ‘exit‘ to get back to the user account you created during the initial install or start a fresh sessions as the user you created during the initial install then issue the following command to download and install ‘rclone‘.
sudo -v ; curl https://rclone.org/install.sh | sudo bashPerform the required ‘rclone setup‘ using the information linked above regarding the hosting providers available.
Additionally we’ll be making use of an application called ‘pigz‘ for fast compression of the files, install it with the following command.
sudo apt install -y pigzIssue this next command to download ‘rcon-cli‘ which will be used for sending warning messages for service restarts and issue save commands before restarting the Palworld service, you can also find a link to the latest version here if you would like to change the download URL below.
wget https://github.com/gorcon/rcon-cli/releases/download/v0.10.3/rcon-0.10.3-i386_linux.tar.gzAfter the file is done downloading, we’ll extract the files then rename the extracted directory with the following two commands, you’ll need to change the file/folder name if you have downloaded a different version.
tar zxvf rcon-0.10.3-i386_linux.tar.gzmv rcon-0.10.3-i386_linux rconNext we’ll make a quick script by using nano again to create a file and edit it via this command.
nano palworldwarn.shAnd then paste the following into the window, changing ‘yourusername‘ in the path of each command to your exact username on the system and ‘rconpassword‘ with the actual admin password you set in the PalworldSettings.ini file.
I don’t know what my username is?
Type ‘pwd‘ before the command above that starts with nano, note the path shown and compare it to the example, your username is the part after ‘/home/‘.
#! /bin/bash
/home/yourusername/rcon/rcon -a 127.0.0.1:25575 -p rconpassword 'broadcast Server_rebooting_in_5_minutes'
sleep 60
/home/yourusername/rcon/rcon -a 127.0.0.1:25575 -p rconpassword 'broadcast Server_rebooting_in_4_minutes'
sleep 60
/home/yourusername/rcon/rcon -a 127.0.0.1:25575 -p rconpassword 'broadcast Server_rebooting_in_3_minutes'
sleep 60
/home/yourusername/rcon/rcon -a 127.0.0.1:25575 -p rconpassword 'broadcast Server_rebooting_in_2_minutes'
sleep 60
/home/yourusername/rcon/rcon -a 127.0.0.1:25575 -p rconpassword 'broadcast Server_rebooting_in_1_minute'
/home/yourusername/rcon/rcon -a 127.0.0.1:25575 -p rconpassword save
Save as you have before by pressing CTRL+X, press Y then enter to save the file.
The script above broadcasts text to the users on the server providing a five minutes of warning and a count down until one minute is left before the service will restart, then at the one minute mark, it also forces the server to save all user’s progress, that last line is not required but is peace of mind given the stability of the Palworld server, saving before it restarts is a little extra insurance in case it corrupts the saves on the restart.
Next we’ll create a companion script that syncs the backups to the cloud provider you previously configured in rclone starting with using nano to create another file with the command below.
nano palworldsync.shThen paste the following text into editor, changing “provider” to the name you configured during the rclone profile setup.
#! /bin/bash
/usr/bin/rclone sync /home/steam/backup/ provider:palworldbackup
Save as you have before by pressing CTRL+X, press Y, then enter to save the file.
This script syncs the backup folder to the cloud storage provider you’ve setup into a folder called ‘palworldbackup‘ within.
Next we’ll mark both files as executable with the following command.
chmod +x palworldwarn.sh palworldsync.shWe’ll need to change back to the ‘steam‘ user by using the following command to make a third and final script.
sudo su - steamWe’ll make a folder to store the palworld backups with the command below.
mkdir backupAnd now to create the third script which will create the backup files that our previous palworldsync.sh script copies to the cloud storage provider
nano palworldbackup.shWithin the editor, paste the following text, what this does is puts all the files in the Palworld server save directory into an archive, names it with the year, month, day, hour and minute it was created. After creating the archive, it deletes any backup files older than 30 days, you can change this value by changing the number in bold below.
#! /bin/bash
tar --use-compress-program="pigz --best -k -p4 " -cf /home/steam/backup/backup-$(date +%Y%m%dT%H%M).tar.gz /home/steam/Steam/steamapps/common/PalServer/Pal/Saved/SaveGames
sleep 1
find /home/steam/backup/* -mtime +30 -delete
Save as you have before by pressing CTRL+X, press Y, then enter to save the file.
Make the script you just saved writable by using the following command
chmod +x palworldbackup.shNext we will start to schedule the backup, sync, and warning scripts via simple cron jobs
Use the following command immediately after the command above
crontab -eThen within the editor, move to the bottom line of the file and paste the following text
2 * * * * /home/steam/palworldbackup.sh > /dev/null 2>&1Save as you have before by pressing CTRL+X, press y, then enter to save the file
This will cause the script that creates and archives the save data for the server to trigger once per hour, two minutes past the hour, for example, at 1:02PM, then 2:02PM, then 3:02PM and so on.
Next, we will exit back to the original user you created when installing the system by issuing this command
exitNow that you are back to the user account you created which is NOT ‘steam‘ or ‘root‘, issue the following command to edit the crontab of this user
crontab -eMove to the bottom of the document and paste the following text
55 3 * * * /home/xipher/palworldwarn.sh > /dev/null 2>&1
5 * * * * /home/xipher/palworldsync.sh > /dev/null 2>&1
Save as you have before by pressing CTRL+X, press y, then enter to save the file
The first line will start the script that starts warning users that the service will restart in 5 minutes at 3:55AM UTC due to the “3” after the “55“, this is since the original example used 4AM UTC as the service restart time, you will need to change the “3” to the hour before the one you picked in the cron job that restarts the service once per day at a specific hour. The next line runs the backup synchronization script to copy the backup files to the cloud provider you setup previously 5 minutes past the top of the hour, such as 1:05PM, 2:05PM, 3:05PM, etc, this means the sync happens 3 minutes after the script that makes the archive so that it has ample time to create the archive and remove old files before the synchronization starts, it also gives the Palworld server time to start and users to get logged back in before running and potentially causing a slowdown right as users are trying to rejoin.
You can wait for the cron jobs to fire to test the scripts, or you can run them manually to test, for example to test the warning script as the normal user account, you would issue the following command
./palworldwarn.shYou’d be able to see the messages in game if you are currently on the server, the same applies for all 3 scripts, you can ‘sudo su – steam’ to switch to the steam user account then issue ./palworldbackup.sh, then ‘cd backup’ and ‘ls -la’ to check the files within that folder, etc, however at this point nearly everything about the server is automated and hands off so long as the sync works.
The server will automatically restart the Palworld service once per day, or if it grows larger than the available memory of the system, it will warn users before the service restarts, it will save backups locally and it will save them remotely to a cloud provider of your choice, the server is now nearly completely set and forget, it will run almost indefinitely with no input like clockwork.
Forwarding Ports for Outside Access
Assuming you are hosting your Palworld server at home behind your own ‘router’, you will need to forward port 8211 on the UDP protocol to the IP address of the server you just created.
The directions for this are incredibly varied and I can’t reasonably write a guide here, but you can follow a guide HERE that may have your specific router with instructions to follow.
Alternatively, your router most likely supports UPnP and you may be able to automatically forward the port by running a simple command on the server its self, we’ll start by installing an application called ‘miniupnpc’ with the following command assuming you are not currently logged in as the ‘steam‘ account.
sudo apt install -y miniupnpcAfter installing ‘miniupnpc’, a new command ‘upnpc’ is available which we will use to try and automatically have the router forward the port using the command below.
upnpc -r 8211 UDP 86400If you receive a message such as “No IGD UPnP Device found on the network !” you will need to manually configure the port forwarding using the link mentioned above
However if you have success with the above command and users are able to connect to your Palworld server, you will also want to automate sending this command at a regular interval to the router to keep the port forward active.
Type the following command to open the crontab and edit it as you have before
crontab -eNext, add this text on a new line at the bottom of the file
*/5 * * * * /usr/bin/upnpc -r 8211 UDP 86400 >/dev/null 2>&1Save as you have before by pressing CTRL+X, press Y, then enter to save the file
The above will run every 5 minutes and reissue the request to the router for a 24hr port forward of port 8211 via the UDP protocol to the Palworld server. The reason for issuing this command every 5 minutes is to cover the event that someone reboots the router or the server, power outages, etc, the Palworld server will never go longer than 5 minutes without being accessible from outside due to a failed portforward in this way.
Automatically cleaning up the save directory
You may notice the backups for your Palworld server getting larger at an alarming rate, this is most likely due to the ‘backup’ directory in the Palworld server save directory, its behavior is erratic at best, sometimes it makes backups, sometimes it does not, and when it does, it never cleans up after its self properly, I would recommend regularly cleaning out the built in backup directory.
First we’ll get the path to your save directory, we’ll start with by swapping to the ‘steam‘ user account if you are not already on it with the following command.
sudo su - steamNext we will navigate to just outside the directory structure that’ll be unique to your install.
cd /home/steam/Steam/steamapps/common/PalServer/Pal/Saved/SaveGames/Type the next command and press enter to get a list of files/folders in the SaveGames directory, it should only have a folder called ‘0‘ within it.
lsThe output will show the folder name you’ll need to enter, it is most likely going to be ‘0‘ and to enter the folder we will issue the next command assuming it is ‘0′.
cd 0And again, we’ll check the contents of the folder we are in, and again there should only be one folder after using the command below
lsThe output should look like a long string of capital letters and numbers, type ‘cd‘, then a space, then type the first number or letter of the output below ‘ls‘ making sure to capitalize any letters, then press the ‘tab‘ button on your keyboard, the rest of the folder name should automatically complete and you can press ‘enter‘, example below.
cd A1B2C3D4E5F6G7H8I9J0Issue the command below to see the contents of this new folder.
lsYou should see something that looks like the following output.
backup LevelMeta.sav Level.sav LocalData.sav PlayersIf you see the ‘Players‘ folder as well as the other .sav files, you are in the correct folder so far, we’ll issue one more command before noting the complete path.
cd backupYou should now be in the correct folder and can issue the command below to get the output you’ll need to copy down somewhere for use later.
pwdThe output you get should look something like the text below.
/home/steam/Steam/steamapps/common/PalServer/Pal/Saved/SaveGames/0/A1B2C3D4E5F6G7H8I9J0/backup/After you copy that output somewhere to have it handy, return to the home directory of the ‘steam‘ user you are still logged in to by using the following command.
cd ~We’ll be making a small edit to the previously created ‘palworldbackup.sh‘ script from a previous section using the command below to open and edit it.
nano palworldbackup.shNext we will be adding the bolded line in the specific position shown below above the ‘tar’ line using the path you copied previously. This will remove the built in backup folder and its contents every time the backup script is run, it is imperative that the path you enter below is correct or you WILL delete all of the save data on your server or worse.
#! /bin/bash
rm -rf /the-path-you-copied-previously-that-ends-in/backup/
tar --use-compress-program="pigz --best -k -p4 " -cf /home/steam/backup/backup-$(date +%Y%m%dT%H%M).tar.gz /home/steam/Steam/steamapps/common/PalServer/Pal/Saved/SaveGames
sleep 1
find /home/steam/backup/* -mtime +30 -delete
Save as you have before by pressing CTRL+X, press y, then enter to save the file.
To give a real world looking example, the file should look like the following text before you save it assuming the path you copied down previously was ‘/home/steam/Steam/steamapps/common/PalServer/Pal/Saved/SaveGames/0/A1B2C3D4E5F6G7H8I9J0/backup/‘.
#! /bin/bash
rm -rf /home/steam/Steam/steamapps/common/PalServer/Pal/Saved/SaveGames/0/A1B2C3D4E5F6G7H8I9J0/backup/
tar --use-compress-program="pigz --best -k -p4 " -cf /home/steam/backup/backup-$(date +%Y%m%dT%H%M).tar.gz /home/steam/Steam/steamapps/common/PalServer/Pal/Saved/SaveGames
sleep 1
find /home/steam/backup/* -mtime +30 -delete
Its very important that you have the path correct or else you may delete the server’s entire save game directory or something else equally as or possibly more important, the path should end in ‘/backup/‘ and should have two folders after ‘/home/steam/Steam/steamapps/common/PalServer/Pal/Saved/SaveGames/‘, you are ultimately responsible for making sure this path is correct before saving the script.
Restoring backups
If you are starting over completely from scratch due to a complete hardware failure or other issue, please follow the guide up until the text “Perform the required ‘rclone setup’ using the information linked above regarding hosting providers available“, this part of the guide will assume you have rclone configured and you have the Palworld server setup, etc.
The first order of business is to bring your backups back to the server if they do not already exist, you can do this by running the following command as the normal user account on the server.
cd ~&&mkdir backup&&rclone copy provider:palworldbackup ./backupThen we will make sure the Palworld server is not running with this command.
sudo systemctl stop palworldNext we’ll become the ‘steam‘ user with this command.
sudo su - steamWe’ll then enter the folder we just created in the home directory of the normal user where the text ‘yournormalusername‘ in bold is the username of the normal user for your server.
cd /home/yournormalusername/backupAnd we’ll look at the contents of the folder to get the file names, the names will include the date, hour and minute it was created, you’ll need to look at the file names and decide which backup you’d like to restore from, copy down the file name of it from the output.
ls -laAn example line of output would be the text below, the file name is in bold, that is what you need to copy down.
-rw-rw-r-- 1 steam steam 15941365 Feb 12 20:10 backup-20240212T2010.tar.gzNext move the file to the ‘steam’ users home directory by using the following command and changing the text ‘yourfilehere‘ in bold to the name of the file you want to restore from.
cp yourfilehere /home/steam/Return to the ‘steam‘ user home directory with this command.
cd ~Next we’ll have the archive put everything back where it was with the following command changing the text ‘yourfilehere‘ in bold to the name of the file you want to restore from.
tar -xf yourfilehere -C /Make note of the path in the output after ‘/home/steam/Steam/steamapps/common/PalServer/Pal/Saved/SaveGames‘, it should include a ‘/0/’ then a folder with many capital letters and numbers, copy this specific folder name down for the next part if you are restoring from scratch and not reverting to a prior save on an existing server.
You’ll need to change the ‘GameUserSettings.ini’ file if you have reinstalled from scratch, to do this, issue the following command.
nano /home/steam/Steam/steamapps/common/PalServer/Pal/Saved/Config/LinuxServer/GameUserSettings.iniLook for a line that says ‘DedicatedServerName=‘, this should be line 7 of the file and there should be a bunch of capital letters and numbers after the ‘=‘ sign such, it will look something like the example below where the specific line is in bold.
[/Script/Pal.PalGameLocalSettings]
AudioSettings=(Master=0.500000,BGM=1.000000,SE=1.000000,PalVoice=1.000000,HumanVoice=1.000000,Ambient=1.000000,UI=1.000000)
GraphicsLevel=None
DefaultGraphicsLevel=None
bRunedBenchMark=False
bHasAppliedUserSetting=False
DedicatedServerName=A1B2C3D4E5F6G7H8I9J0
AntiAliasingType=AAM_TSR
DLSSMode=Performance
GraphicsCommonQuality=0
Delete all of the numbers and letters after ‘DedicatedServerName=‘, then paste the numbers and letters you copied from the path above during restoring from the archive then save as you have before by pressing CTRL+X, press y, then enter to save the file.
With the files restored and the configuration file change made, its time to exit from the ‘steam‘ user with this command.
exitAnd start the Palworld server with the following command.
sudo systemctl start palworldYour server should be back to working as it was on the date of the backup you restored.